Initial Setup
Before developing the BRMS rules engine project we need to install BRMS Rule engine and JBoss Developer studio as explained below
Use below link to install the BRMS Rule Engine.
1. Install BRMS Rule
2. Install JBOSS Developer Studio
This section will explain how to create the BRMS rule project using JBoss Developer studio
- Go to File->New->Other to open the open the project wizards and select Drools Project
- Click on Next
3. Give the project Name here I given “MetaValidation”
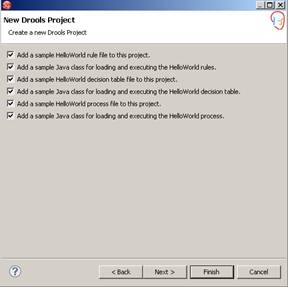
4. Select the entire sample as mentioned in below figure which will be providing you sample code which helps you to understand.
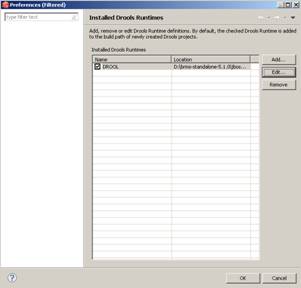
5. Next Screen is to configure Drools Runtime environment
6. Select the below path in Drools Runtime Environment Path section and click OK
<BRMS Standalone home>\jboss-as-web\server\default\deploy\jboss-brms.war\WEB-INF\li
7. Select the new Drools Runtime environment in your project.
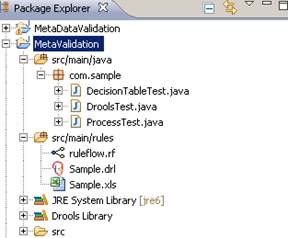
8. After completing you will be getting Drool project as shown below figure. You could also see some sample rule flow, business rules and sample test classes.
New BRMS Rule Creation
In this section I will explain how to create & test the small rules
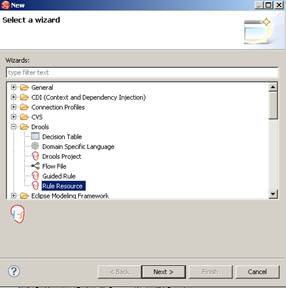
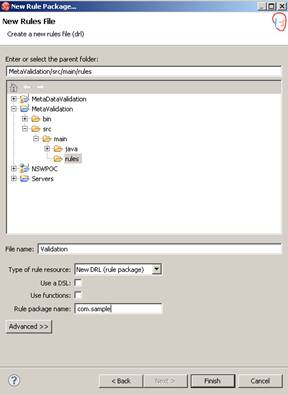
1. Right click on src/main/rules and select the Rules Resource and click on the Next button
2. Give the Rule Name and package name and click finish which will create new business Rule file with template
3. Below is the new Rules template file which
package com.sample
rule "Your First Rule"
when
#condition
then
#action
end
rule " Your Second Rule"
#include attribute such as "salience here....
when
#condition
then
#action
end
Every rule will be starting with rule keyword and then name of the rule. Condition will be starting with “when” keyword and then “action” keyword to process the action. We can define the rules group or salience which prioritize the execution of rules which I will explain in my next section.
4. Will create simple rule i.e. length of member of metadata should be 6.
rule "cost Center"
ruleflow-group "group1"
when
m:Metadata(member.length==8)
then
m.setMessage("Cost Center Metadata is Valid");
end
It represents that “Cost Center” rule which belong to rule flow-group “group1” uses the Metadata POJO object which assign into variable m and check the condition if length of member is 8 then show the message that Cost Center Metadata is valid.
m.setMessage(..) can be used to set the message and later can be accessed into Client or Test class.
Small Rule Flow Creation
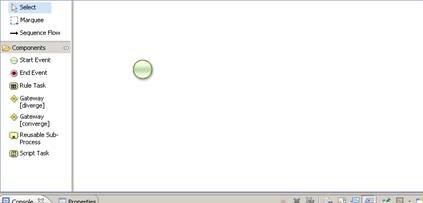
1. Right click on src/main/rules and select other which will open the new Flow file wizards.
2. Select the “Flow File” and click next which will move to next screen where you can give the Rule flow file name click finish which creates the new Flow File with component bar on left side.
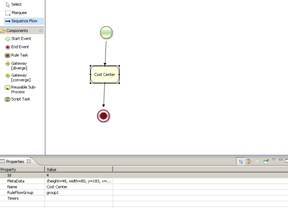
3. Select the Rule task and place into rule drawing pane.
4. Open the Rule flow property and give the name of the Rule task and link it to with rule putting group1 on RuleFlowGroup section. If you remember we have add the rule flow group as group1 which will link rule flow with Cost Center rul.
Rule Testing
1. Create new ValidationTest class to test Rules
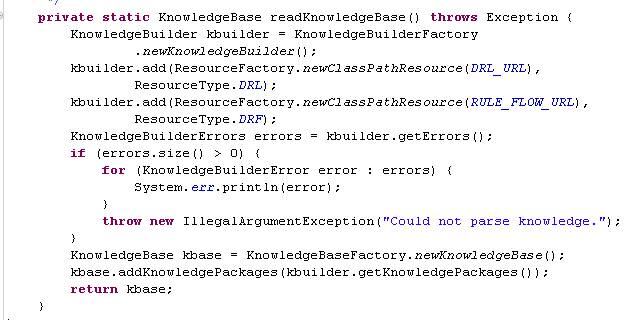
2. Write the method readKnowledgeBase which is already available in sample or you can use below code as well
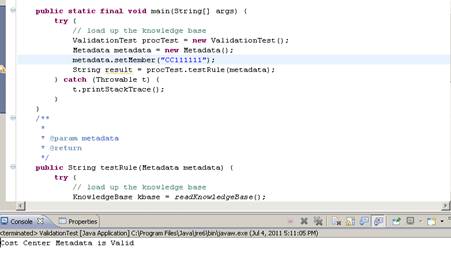
3. Use the below code to write the test client class.
package com.sample;
import org.drools.KnowledgeBase;
import org.drools.KnowledgeBaseFactory;
import org.drools.builder.KnowledgeBuilder;
import org.drools.builder.KnowledgeBuilderError;
import org.drools.builder.KnowledgeBuilderErrors;
import org.drools.builder.KnowledgeBuilderFactory;
import org.drools.builder.ResourceType;
import org.drools.io.ResourceFactory;
import org.drools.logger.KnowledgeRuntimeLogger;
import org.drools.logger.KnowledgeRuntimeLoggerFactory;
import org.drools.runtime.StatefulKnowledgeSession;

public class ValidationTest {

public static final String DRL_URL = "Validation.drl";
 public static final String RULE_FLOW_URL = "ruleflow.rf";
 public static final void main(String[] args) {
 try {
 // load up the knowledge base
 ValidationTest procTest = new ValidationTest();
 Metadata metadata = new Metadata();
 metadata.setMember("FD1111");
 String result = procTest.testRule(metadata);
 } catch (Throwable t) {
 t.printStackTrace();
 }
 }
 public String testRule(Metadata metadata) {
 try {
 // load up the knowledge base
 KnowledgeBase kbase = readKnowledgeBase();
 StatefulKnowledgeSession ksession = kbase
 .newStatefulKnowledgeSession();
 ksession.insert(metadata);
 KnowledgeRuntimeLogger logger = KnowledgeRuntimeLoggerFactory
 .newFileLogger(ksession, "test");
 // start a new process instance
 ksession.startProcess("com.sample.ruleflow");
 ksession.fireAllRules();
 logger.close();
 } catch (Throwable t) {
 t.printStackTrace();
 }
 return metadata.getMessage();
 }
 private static KnowledgeBase readKnowledgeBase() throws Exception {
 KnowledgeBuilder kbuilder = KnowledgeBuilderFactory
 .newKnowledgeBuilder();
 kbuilder.add(ResourceFactory.newClassPathResource(DRL_URL),
 ResourceType.DRL);
 kbuilder.add(ResourceFactory.newClassPathResource(RULE_FLOW_URL),
 ResourceType.DRF);
 KnowledgeBuilderErrors errors = kbuilder.getErrors();
 if (errors.size() > 0) {
 for (KnowledgeBuilderError error : errors) {
 System.err.println(error);
 }
 throw new IllegalArgumentException("Could not parse knowledge.");
 }
 KnowledgeBase kbase = KnowledgeBaseFactory.newKnowledgeBase();
 kbase.addKnowledgePackages(kbuilder.getKnowledgePackages());
 return kbase;
 }
}
4. Right click on the test class and run as Java Application which will provide you output on console

I can assume we have understood how to create the simple BRMS rules and test the same. In this section I would try to explore the complex rules creation. We will also learn how to prioritize & routing of rules using the rules flow. We will also see the proper use of Rule flow group.
Below are the rules which will be implementing using the BRMS
1. If Dimension of Metadata is CC then member length should be 8
2. if Dimension of Metadata is FE then member length should be 6
3. Dimension of Metadata should either be CC or FE
Rule Creation
Below code depicts the different rules have been created to cater the above validation. If you see carefully explored then you will find that I grouped rules in different group’s group1, group2 and group3 . In this way we can instruct to the rules engine to run the group of rules separately.
#created on: Jun 29, 2011
package com.sample
#list any import classes here.
import com.sample.Metadata;
rule "Cost Center"
ruleflow-group "group1"
 when
 m: Metadata (member.length == 8 )
 then
 System.out.println("Cost Center Metadata is Valid");
 m.setMessage("Cost Center Metadata is Valid");
end

rule "Cost Center Invalid"
ruleflow-group "group1"
 when
 m: Metadata (member.length != 8 )
 then
 System.out.println("Cost Center Metadata is Invalid");
 m.setMessage("Cost Center Metadata is Invalid");
end

rule "Fund Entity"
ruleflow-group "group2"
 when
 m: Metadata (member.length == 6)
 then
 System.out.println("Fund Entity Metadata is Valid");
 m.setMessage("Fund Entity Metadata is Valid");
end

rule "Fund Entity Invalid"
ruleflow-group "group2"
 when
 m: Metadata (member.length != 6)
 then
 System.out.println("Fund Entity Metadata is Invalid");
 m.setMessage("Fund Entity Metadata is Invalid");
end

rule "Not Valid"
ruleflow-group "group3"
when
 m: Metadata (eval(true))
 then
 System.out.println("Meta Data Not Valid");
 m.setMessage("Meta Data Not Valid");
 //m.setStatus("FE");
end
Rule Flow Creation
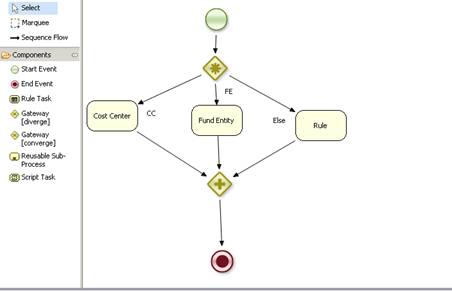
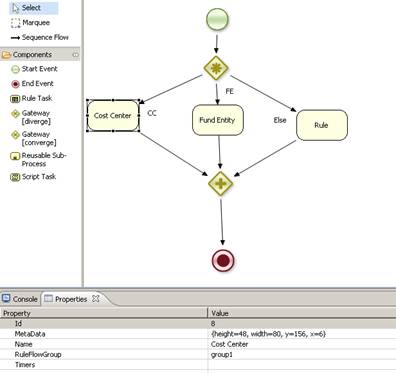
We branched rule in three category i.e. CC, FE & Else. If dimension is CC then executes the CC related rules i.e. group1. if dimension is FE then execute FE related rule i.e. group2. If dimension is neither CC nor FE then execute Else part of the rule i.e. group3.
1. Create the new rule file
2. Select the” Start” & “End” component and add into pane
3. Add the Gateway diverge
4. Add 3 “Rule Task” components in the pane as mentioned in below figures.
5. Add the Gateway Converge as mentioned in the below figure
6. Select the Gateway diverge properties and select the Type as “OR”
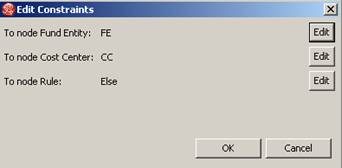
7. Click on the Constraints which will open “Edit Constraints” window
8. Click on First Node Entity enter the name “FE”, Type “rule” and Dialect as “java”
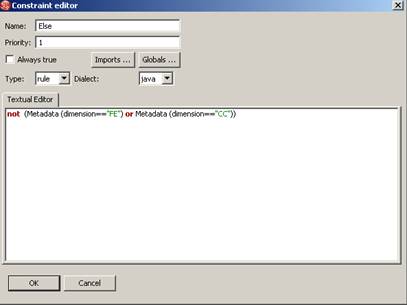
9. Enter the Metadata (dimension=”FE”) in the Textual Editor
10.
This would add the routing for FE dimension
11. Similar way Edit the Constraint for CC
12.Similar way Edit the Constraint for Else
13. Select the Cost Center(CC) Rule Task property enter the name Cost Center and RuleFlowGroup as “group1”
14. In the similar way add the RuleFlowGroup for FE and group2 and Else group
15. Run the application as mentioned in Rule Testing section